Insalata Russa or translated from Italian, Russian salad. It’s the perfect side dish.
We can’t seem to get enough of it. It was such a special treat when my mother or grandmother made it. My grandmother taught me how to make it when I was very young, and I am so thankful she did.

She made it look easy and, of course, never followed a recipe—just potatoes, hard-boiled eggs, tuna, giardiniera, and mayonnaise.
Do not let all the ingredients fool you, and this divine Italian potato salad is rich in flavor and always welcome. The added boiled egg gives it a rich creamy texture and flavor.
Another wonderful recipe to try is this Classic Potato salad. You will not be disappointed.
In this Article
- Deliciously good with each bite.
- Origins of Insalata Russa
- Insalata Russa is a versatile dish
- What is Giardiniera?
- Here are a few helpful tips for the ingredients needed to make this delicious Insalata Russa or potato Russian salad recipe.
- Equipment needed
- Cooking tips and step-by-step instructions on how to make this simple insalata russa recipe
- Time to assemble your potato Russian salad
- Storage instructions
- If you enjoy this delicious insalata russa recipe, look at my other recipes.
- Insalata Russa
Deliciously good with each bite.
I have not made it in years and was reminiscing about our travels through Spain.
Everywhere we went, we had Ensaladilla Rusa or Spanish Potato Salad with tuna. A trendy Spanish potato salad.
There are slight differences from the Italian version, Insalata Russa, but needless to say, it is deliciously good with each bite.
As soon as I got home, I made my version following the teaching of Italian recipes.
Creation took over because I never wrote the recipe down when I was younger, and here is my version.
Origins of Insalata Russa
The origin of the Insalata Russa can be traced to 1860. Some say it was created by a Belgian who worked in a prestigious restaurant in Moscow.
Others were from France during Caterina De Medici, Russia, and the Piemonte region of Italy.
There are so many hypotheses about the actual place of origin that it is impossible to mention them all.

Insalata Russa is a versatile dish
Enjoy it as an appetizer or, like in Spain, as a tapas with your favorite cocktail.
Transport yourself to an Italian restaurant or Spanish cafe and enjoy a few relaxing moments.
Enjoying it alongside boiled chicken or beef is almost a requirement.
And, of course, when you have a BBQ or a simple burger, this Insalata Russa is just perfect to go alongside.
Perfect kids’ recipe for their afternoon snack. Roll the Insalata Russa inside slices of ham to make it fun for the little ones. Kids love it.
What is Giardiniera?
Italian giardiniera, also called sottoaceti ( under vinegar), is a command term used for pickled food and is typically eaten as an antipasto or with salads.
Another excellent use for your giardiniera is to chop it into fine pieces and mix it with mayo to create a wonderful spread for your sandwich.
A side note: most giardiniera vegetables are carrots, celery, cauliflower, and the bonus of pepperoncini.
The pepperoncini, add some heat. I never used them and never saw it with the Insalata Russa.
However, if you want to try, know that a little one is as potent, if not more than a jalapeno or chili pepper.

Here are a few helpful tips for the ingredients needed to make this delicious Insalata Russa or potato Russian salad recipe.
This is a quick introduction, and as you can see, the list of ingredients is short and includes essentials you may already have in your pantry. Please read the recipe for complete instructions.
Large potatoes: use old potatoes or ones with very thick skin. They boil better and do not disintegrate when cooked. Cut them all the same size cubes for better cooking.
Hard-boiled eggs: Chopped it gives a beautiful flavor once combined with the mayonnaise and potatoes. Reserve one hard-boiled egg that you will slice to use as decoration.
Peas: Frozen peas that are thawed and then softened by cooking them in a very little amount of water until tender but not soggy. They bring a balance of sweetness with the acidity of the giardiniera.
Giardiniera: Italian pickled vegetables. My family and my favorite is Mezzetta—the closest to the original Italian.
Capers: Add the saltiness needed and blends beautifully with the potatoes and mayo. Always rinse capers. You need to remove either the salt taste or the vinegar taste.
Dijon Mustard: Balances the sweetness of the mayo and peas, and you do not taste it, therefore, do not skip it, but enhances the flavor of your dish by bringing the perfect seasoning to the mix. Use French Dijon mustard, a must.
French cornichons: instead of the soft American pickle. The French counterpart is crunchier and has a great flavor on the pungent side, which is perfect for this dish. The American pickle is sweeter and will change the taste of the dish.
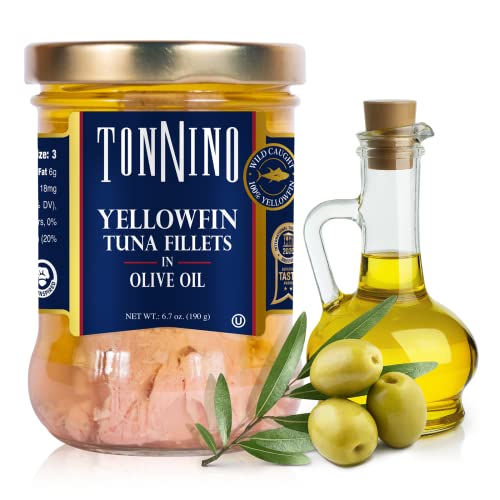
Tuna in oil: Always buy tuna packed under oil as it preserves all the natural flavor of the tuna and does not add extra acidity. Easily accessible.
Mayonnaise: Kraft is the only one I recommend using or homemade. It binds everything together beautifully. Best Food is on the sweeter side and not ideal to use with this dish.
Equipment needed
I only recommend what I use and love.
Large pot to boil the potatoes
Small pan for your peas
Small pot for the eggs
Cutting board in wood as it works best with your knifes
Sharp chef’s knife to do all the chopping
Large bowl, used to mix all the ingredients and refrigerate until ready to use.
Insalata Russa is generally served in a large bowl or a serving plate, or you can create individual servings.
Just let your imagination flow.
Cooking tips and step-by-step instructions on how to make this simple insalata russa recipe
Have all the ingredients on hand before starting with the recipe.
- Peel and dice the potatoes, all the same size for even cooking, and place them in a large pot of salted water.
- Cook until the blade of a knife goes thru a piece of potato quickly and they are not falling apart.
- Drain and let them dry out before adding the other ingredients. If hot, the mayonnaise will melt, which is not what you want.
- Cook the eggs until they reach hard-boiled egg status, about 10 to 12 minutes, depending on the egg size. Less if small. Cool off under running cold water and set aside.
- Chop the giardiniera, cornichons, prepare the capers, and set aside.
Time to assemble your potato Russian salad
In a large bowl, add all the chopped giardiniera, peas, tuna, capers, mustard, cornichons, and two of the hardboiled eggs, and half of the mayonnaise. Mix well.
Add the cooled potatoes to the bowl and mix well. Add more mayonnaise as you go along to have a soft creamy consistency. Taste and adjust the seasoning with salt and pepper.
Once done, it must be refrigerated for at least one hour.
Place a saran plastic wrap over the potato mix. Do not worry if it touches your salad. Doing so will prevent water from forming on the top you don’t want.

Storage instructions
I love to make extra to enjoy it for lunch or a quick late-afternoon snack.
I recommend storing the leftover in an airtight glass container to preserve for several days.
Do place a cover of saran plastic wrap touching the potato salad. This process will eliminate extra water forming from condensation.
That water can create bacteria, making your potato salad sour and uneatable.
If you enjoy this delicious insalata russa recipe, look at my other recipes.
Mushrooms, Sausage Ragu with Polenta
Equipment and ingredients used


Insalata Russa

Ingredients
Instructions
- Boil the cubed potatoes with sea salt until done but not falling apart. Drain well and set aside to cool off. Cook the peas in a small pan with some water until slightly tender. Drain and set aside.
- Chop 3 of the hard-boiled eggs into small cubes. Slice the remaining egg and set it aside (used for garnishing)
- Cut in small pieces the Giardiniera and add them to a large bowl. Add the peas, tuna, rinsed caper, mustard, chopped eggs, chopped cornichons, salt and pepper, half of the mayonnaise. Mix well.
- Add the cooled diced potatoes to the bowl and mix well. Add more mayonnaise as you go along until you have a soft consistency salad. Taste to adjust the flavor.
- Let the Insalata rest in the refrigerator for at least 1 hour, decorate with the sliced egg, and serve.
Notes
Nutrition
Giangi’s Kitchen provides nutritional information, but these figures should be considered estimates, as a registered dietician does not calculate them.
- Course: Appetizers, Salads
- Cuisine: Italian
- Occasion: Fourth of July
- Season: Spring, Summer
- Type: Affordable Gourmet
Did you make this?
Leave a comment below and tag @giangiskitchen on Instagram
Visit my Amazon Storefront for my selection of favorite kitchen essentials. I only recommend equipment that I use and love.

Please read my privacy policy for more info. I only recommend the products that I love and use. This site contains affiliate links to products. We may receive a commission for purchases made through these links.
Originally published on May 13, 2021. Updated on June 9, 2023.


Carolyn
What are pounces of giardiniera?
Giangi Townsend
Thank you, Carolyn, to bring that up to my attentions. I correct it and it should say “ounces.”
Enjoy!
Adrianne
This looks like a quick and easy family recipe. Love that your family cook together!! Cheers
Giangi Townsend
We sure do enjoy time together in the kitchen. Laughter, talk, sharing love.
The recipe is very fast and I am sure you will enjoy it.
Thank you for stopping by Giangi’s Kitchen.
xoxo
Cathy
Oh this salad sounds terrific! Perfect now for these hot summer days! This dish will be perfect for my BBQ this weekend! Thank you for the inspiration!
Giangi Townsend
The pleasure is all mine. I am sure you will love it, but I do want your feedback.
Enjoy your weekend BBQ.
xoxo
Adriana
This is definitely a classic and a family favorite. At homemy mother was used to prepare Insalata russa for parties, What a treat!
Giangi Townsend
An absolutely a classic treat. I loved it how everywhere we went this summer it had a presence on the table.
Bring back fond memories of the special peoples in our lives.
Thank you Adriana for stopping by and reading my recipe.
Natalie
Looks so delicious and brings me back to my childhood!
Giangi Townsend
Thank you Natalie, I am happy it brought you back to your childhood. Those are wonderful memories to carry in our hearts.
Thank you for reading my post
Dahn
My grandmother used to cook like that too… no recipe. The best recipes come from people that watch their grandmas and write everything down. This sounds delicious
Giangi Townsend
How wonderful that you have the same heart warming memories of your grandmother. It is their gift to us.
Give the recipe a try, I am sure you will enjoy it. It sure was delicious.
Thank you for stopping by Giangi’s Kitchen.